LightSafer is a tiny, silent hotel safe alarm - read all about it on the LightSafer home page.
With LightSafer turned off, press the joystick in for a couple of seconds. Three green LEDs will light.
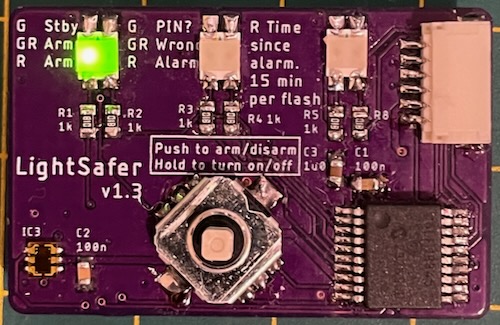
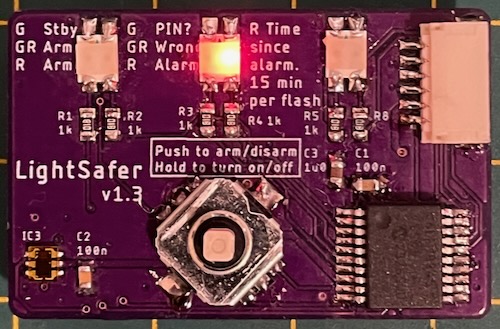
The LEDs will then indicate the battery level, from low (one LED on the left) to high (all 6 LEDs lit). The image below shows 4 LEDs lit, so this LightSafer has a bit less than full battery level.
One LED means that the voltage is below 2.7V, and you should change the battery.
LightSafer is now in a standby state with one green LED lit. It will turn back off after 30 seconds of inactivity, to preserve battery life.
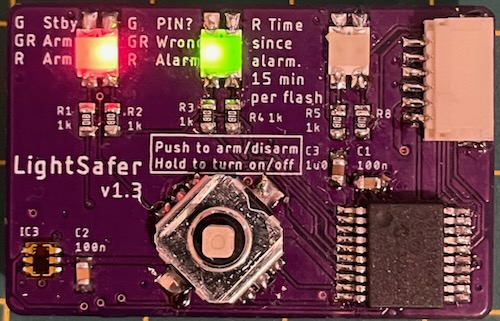
When in the standby state, arm the device by pressing the joystick in once. The red and green LEDs light:
You now have 20 seconds to put LightSafer in your safe (or other dark place you want to protect!). Press the joystick in again before the end of the 20 seconds to cancel the arming state and go back to standby.
Once LightSafer is armed, the red 'armed' LED will briefly illuminate, before all LEDs turn off, saving power whilst armed. You won't see this happen because you'll have closed up your safe, or zipped your bag up.
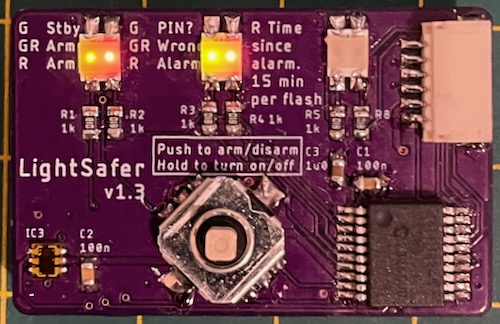
As soon as LightSafer sees a small amount of light, it will light up the red and green LEDs and request your PIN - you now have 30 seconds, or 3 attempts to input the correct PIN. To enter the pin, use the up (1), right (2), down (3) and left (4) directions on the joystick. For example, to enter the PIN of 12341234, enter up, right, down, left, up, right, down, left.
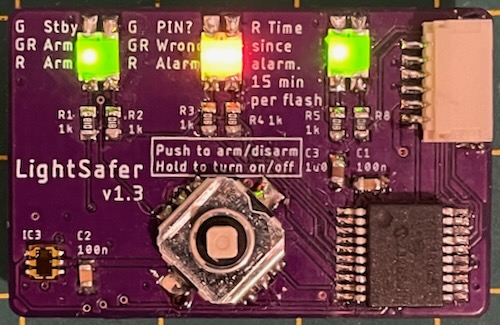
If you get the PIN wrong, the following LEDs light:

You then get another go at entering the correct PIN. If you get the PIN right then you'll be shown your safety code.
This is really important! This is a random set of LEDs that is unique to each device. It is shown to you every time you disarm the device. Because the LEDs are unique to each device, it allows you to check that nobody has reprogrammed your device, or switched it for another one. If the safety LEDs shown to you ever change then your device has been tampered with. You will only ever see the safety LEDs when you enter the correct PIN to disarm the device.
If you get the code wrong three times, or take more than 30 seconds to enter a code then Lightsafer will enter the alarm state.
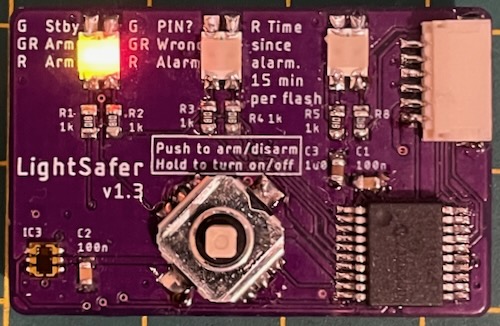
The alarm state looks like this:
You will be in this state if LightSafer had previously been armed, then triggered by a small amount of light, then the correct PIN wasn't entered. You can work out how long ago the alarm was set off by briefly pressing the joystick in. The right red LED will flash once for each 15 minute period since the alarm was triggered. For example if it were triggered an hour ago, the LED would flash 4 times.
To get LightSafer out of the alarm state, press and hold the joystick for a few seconds, then enter the correct PIN and you'll be back in the standby state.
You can change the PIN from the default (11111111) using the following method:

Andy C
May 2025
tribune.gadgets-9y@icloud.com